I’ve rearranged my home office at least a dozen times. And each time, I thought I’d finally cracked the code only to realize two weeks later that my chair was blocking the closet or I couldn’t roll back from my desk without hitting the wall. If you’re trying to figure out how to layout a small home office without making the same mistakes I did, you’re in the right place.
The difference between a workspace that feels cramped and one that actually flows comes down to layout. Not fancy furniture. Not expensive gear. Just smart positioning of what you already have. For a complete breakdown of workspace design strategies, this guide on Productive Home Workspace Design for Small Spaces covers the full framework.
Why Layout Matters More Than You Think
Most people focus on buying the right desk or chair and assume the layout will just work itself out. It doesn’t.
A bad layout in a small home office creates friction every single day. You’re constantly bumping into things. Your cables are a tangled mess because you didn’t plan for outlet placement. You positioned your desk facing a wall because it was the only spot that fit, and now every workday feels like staring into a cave.
I learned this the hard way in my first apartment. I shoved my desk against the wall opposite my bed because that’s where it fit. Technically it worked. Practically? I hated sitting there. No natural light. No view. Just me, the wall, and eight hours of video calls with terrible lighting.
Layout isn’t about aesthetics—it’s about whether your workspace makes you feel productive or claustrophobic. And in small homes, getting it right the first time saves you from moving furniture around like I did.
The Corner Setup (My Go-To for Tight Spaces)
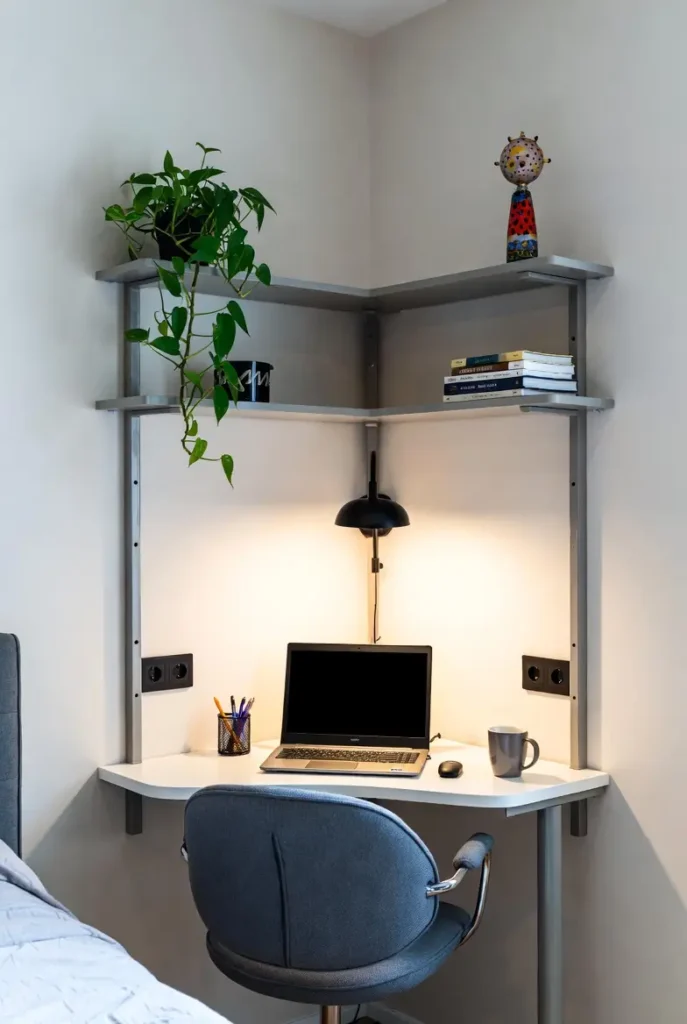
Corner desks get overlooked, but they’re honestly one of the best home office layout ideas for small rooms. Why? Because corners are usually dead space anyway. You’re not losing floor area—you’re activating something that was doing nothing.
I used a corner setup in a 10×10 bedroom for two years. L-shaped desk tucked into the corner, monitor on one side, laptop on the other. It gave me way more surface area than a standard desk would’ve in the same footprint, and I could swivel between tasks without getting up.
The trick is making sure you’ve got clearance. If your chair can’t roll out from the corner without hitting your bed or dresser, the layout falls apart fast.
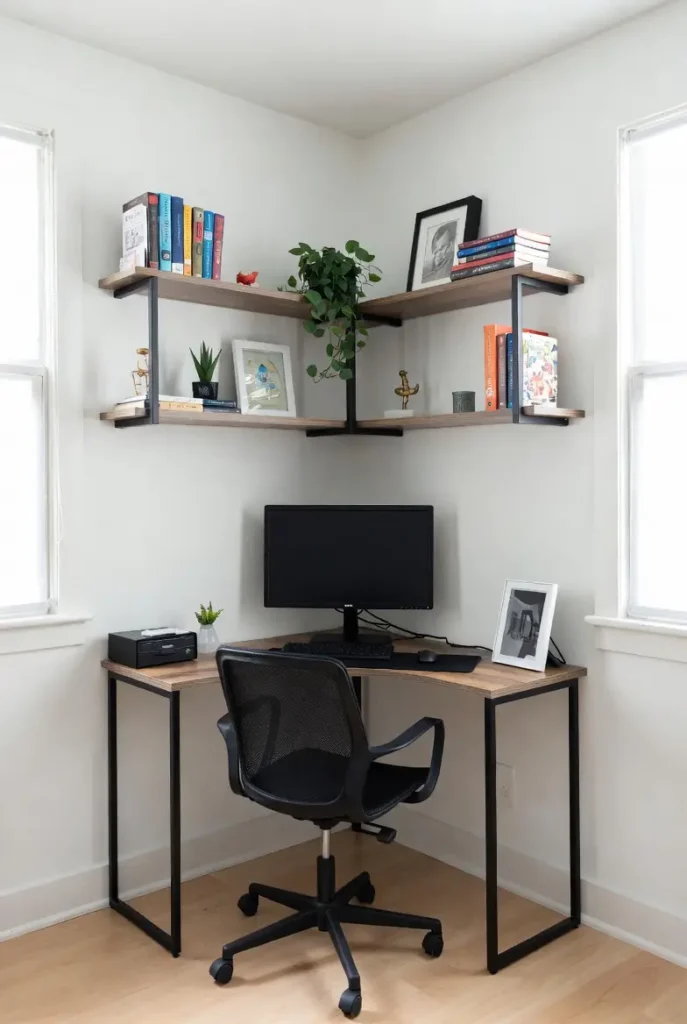
How to make corner layouts work:
- Measure corner-to-corner to confirm an L-desk will actually fit with clearance
- Position your monitor on the longer side to reduce neck strain
- Use the shorter side for a laptop, notebook, or secondary work surface
- Mount a small shelf above the desk for vertical storage
- Keep cables organized along the wall seams to avoid tangling
This layout works especially well in small bedroom workspace ideas where you need to keep the office zone separate from the sleeping zone. The corner naturally defines boundaries.
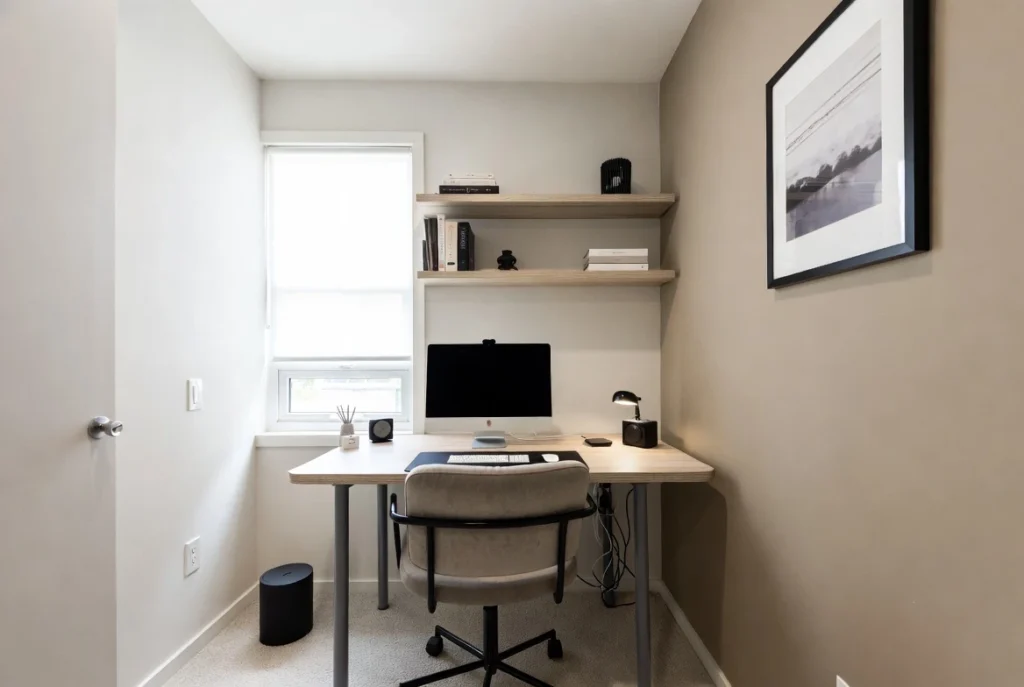
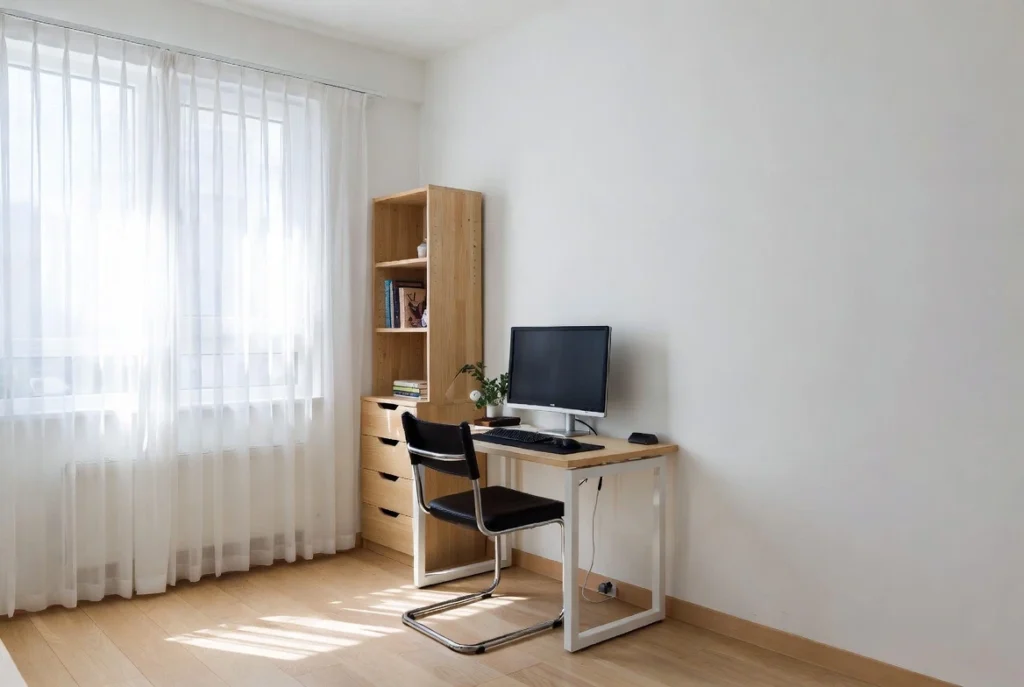
The Window-Facing Layout (If You’ve Got the Light)
If you have a window, use it. I know this sounds basic, but I’ve walked into so many small home offices where the desk faces away from the only natural light source in the room. It’s a missed opportunity.
Positioning your desk near or facing a window does a few things. It reduces eye strain because you’re not staring at a screen in a dark room. It gives you something to look at that isn’t your monitor. And honestly, it just makes the space feel less oppressive when you’re working long hours.
The challenge in small spaces is that windows are often on the same wall as doors, closets, or other furniture. You’ve got to balance light with function. I’ve done a side-angle setup before—desk perpendicular to the window—which still gets you the light without forcing you to face the glare head-on.
Steps for window-facing layouts:
- Test glare at different times of day before committing to placement
- Position your desk perpendicular to the window if direct light creates screen glare
- Use sheer curtains or blinds to diffuse harsh afternoon sun
- Keep the area between your desk and window clear for airflow and light
- Add a small plant on the windowsill to soften the workspace visually
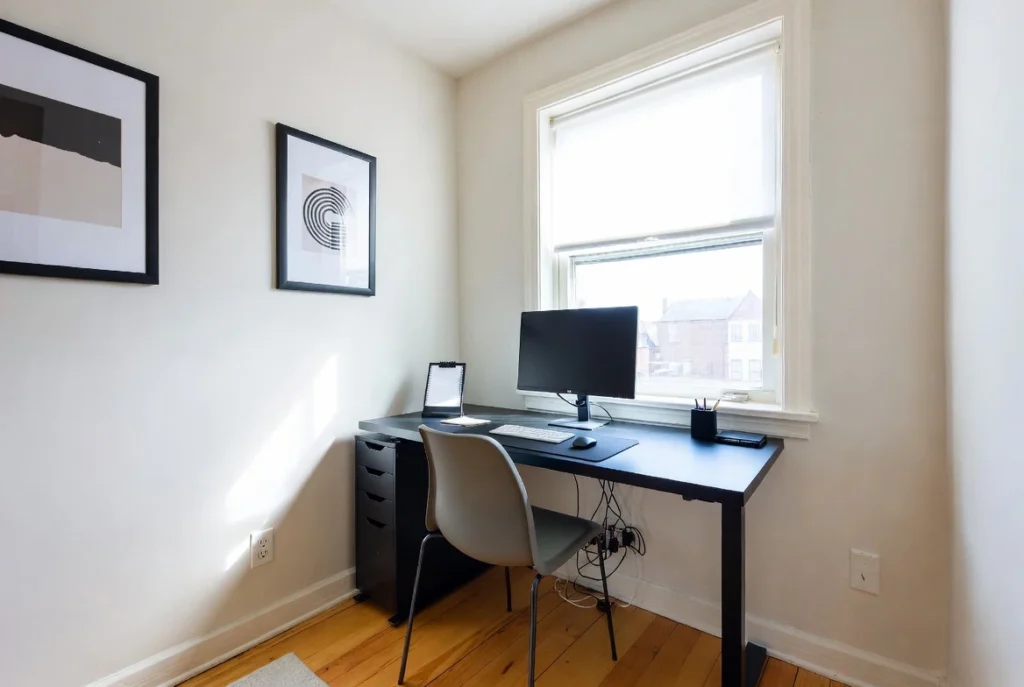
This is one of those small home office layout ideas that improves your mood as much as your productivity. Natural light matters more than people give it credit for.
The Floating Desk Layout (For Shared Rooms)
When your “office” is also your living room, bedroom, or even a hallway, a floating desk layout gives you flexibility without eating up the whole room.
Floating desks are essentially wall-mounted surfaces with no legs or minimal support. I’ve used them in studio apartments where floor space was non-negotiable. You mount them at the right height, use them when you’re working, and the room still feels open because there’s no bulky furniture anchoring the space.
The downside? Limited storage. You can’t fit drawers or cabinets underneath a wall-mounted desk, so you’ll need to get creative with shelving or baskets. But if your priority is keeping a small workspace at home from dominating the room, this layout pays off.
What makes floating layouts work:
- Mount the desk at proper ergonomic height (usually 28-30 inches for most people)
- Install a floating shelf directly above for frequently used supplies
- Use wall-mounted organizers instead of desktop storage
- Choose a fold-down design if you need the desk to disappear completely
- Anchor securely into studs—not just drywall—to support monitor weight
I’ve seen this layout used successfully in small coworking space ideas too, where multiple people need desks but the room can’t handle traditional furniture density.
The Closet Office (Yes, Seriously)
This sounds extreme, but converting a closet into a workspace is one of the smartest small space office moves I’ve seen—and done.
If you’ve got a closet you’re not fully using, remove the door, add a desk surface that fits the width, and you’ve got an instant office nook. The walls on three sides give you built-in privacy and sound dampening. You can add shelves on both sides for storage. And when you’re done working, you can literally close the door (if you keep it) and hide the whole setup.
I turned a bedroom closet into an office in a rental once. Mounted a butcher block countertop as the desk, added battery-powered LED strips for lighting, and kept my chair tucked in when I wasn’t using it. Worked perfectly and didn’t take up any actual room space.
Making a closet office functional:
- Remove or rehang the closet door to swing outward if it blocks access
- Measure depth carefully—most closets are 24 inches deep, which is tight but workable
- Install task lighting since closets rarely have overhead fixtures
- Add a small fan or keep the door open during use to prevent heat buildup
- Use the sidewalls for shallow shelving to maximize storage
This is an underrated option for workspace ideas for small rooms where you genuinely don’t have space for a traditional desk setup.
The Mobile Workspace (For Ultimate Flexibility)
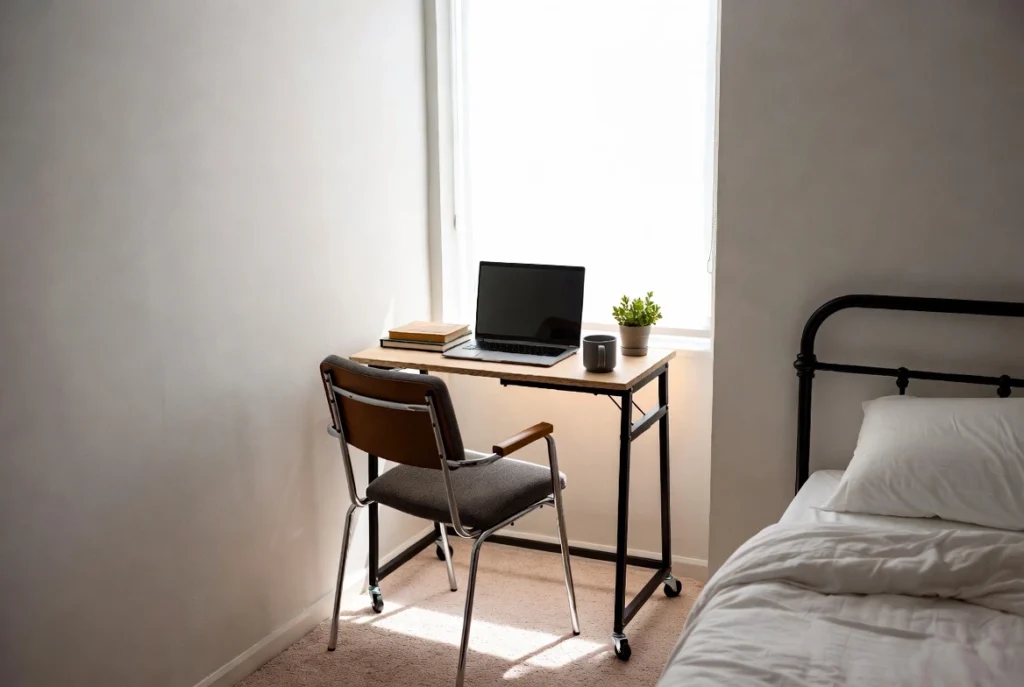
Sometimes the best small home office layout is one that isn’t permanent at all.
I’ve used a rolling cart as a mobile workspace in a studio apartment. Everything I needed—laptop, notebook, pens, charger—lived on the cart. I could roll it next to the couch, push it to the window for better light, or tuck it away completely when I had people over.
Mobile setups work best if you’re mostly digital and don’t need a lot of gear. They’re not ideal if you’ve got dual monitors and a bunch of peripherals. But for people working in small homes with zero dedicated office space, mobility gives you options traditional home office design and build approaches don’t.
How to build a mobile workspace:
- Choose a cart with locking wheels so it doesn’t slide while you’re typing
- Keep the top tier for your laptop and immediate work surface
- Use lower tiers for charging cables, notebooks, and supplies
- Add a small clip-on lamp if you move the cart to different lighting conditions
- Store the cart in a closet or against a wall when not in use
I wouldn’t recommend this as a permanent solution if you work 40+ hours a week. But for side hustles, part-time remote work, or small workspace at home situations where you need flexibility, it’s surprisingly effective.
The Dual-Zone Layout (Office Meets Everything Else)
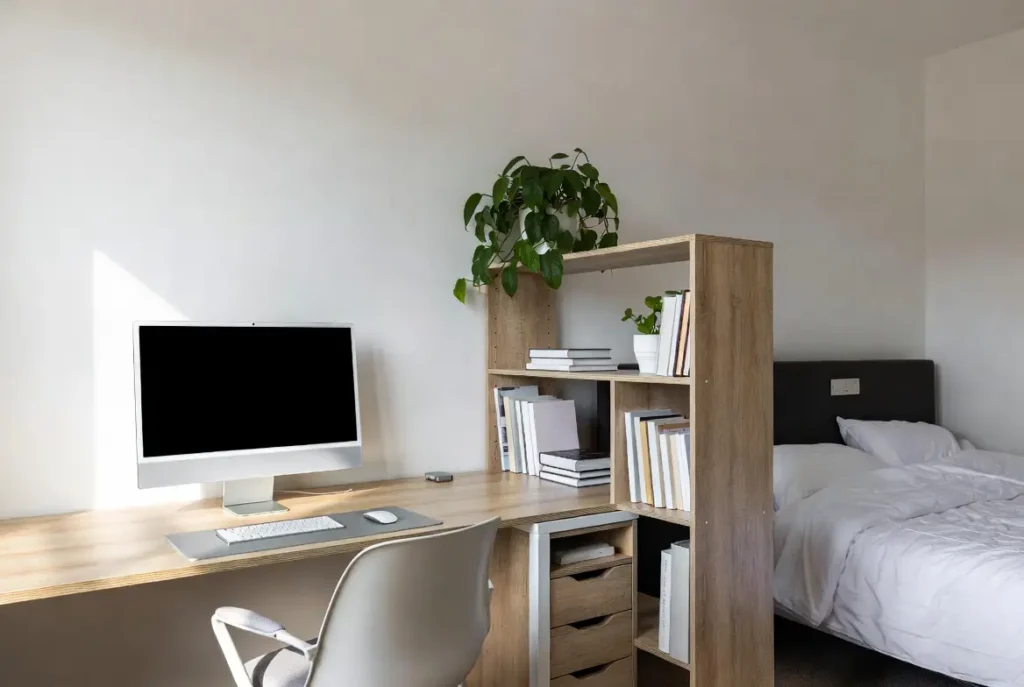
In really small spaces, you’re probably sharing a room with another function—sleeping, dining, entertaining, whatever. Dual-zone layouts acknowledge that and design around it instead of pretending the desk exists in isolation.
I’ve done this in a guest bedroom that doubled as my office. Desk on one side, daybed on the other, bookshelf in the middle acting as a room divider. The shelf gave me storage for both work stuff and guest room stuff, and it created a visual boundary so the space didn’t feel like one chaotic mess.
The key is making sure each zone has what it needs without bleeding into the other. Your work zone needs a desk, chair, and task lighting. The other zone needs whatever makes that function work. And ideally, there’s something—furniture, a rug, even different lighting—that separates them.
Creating dual-zone layouts:
- Use a bookshelf or low cabinet to visually divide the room without blocking light
- Position your desk facing away from the other zone to reduce distractions
- Use different lighting in each zone (task light for work, softer light for relaxation)
- Keep a separate rug or floor mat under your desk to define the workspace
- Store work items out of sight when you’re using the room for its other function
This layout shows up a lot in home office design architectural digest features, but the real-world version is less about aesthetics and more about function. It’s about making one room serve two purposes without either one feeling like an afterthought.
The Alcove or Nook Layout (Hidden in Plain Sight)
If your apartment or house has an alcove, hallway nook, or awkward under-stair area, you’ve got workspace potential.
These spots are usually too small for anything else, which makes them perfect for a compact desk setup. I’ve squeezed a workspace into a hallway alcove that was maybe three feet wide. Just enough room for a narrow desk and a chair. Not spacious, but completely functional and it used space that was otherwise pointless.
The challenge with nook layouts is ventilation and lighting. These areas are often tucked away from windows and airflow, so you’ll need to add your own light and maybe a small fan if it gets stuffy.
Nook layout essentials:
- Measure width and depth precisely—nooks are unforgiving if furniture is even an inch too big
- Use a narrow desk (20-24 inches deep max) to avoid blocking the surrounding space
- Install wall-mounted lighting since nooks rarely have overhead fixtures
- Add a hook or peg rail on the side wall for bags and headphones
- Keep decor minimal to prevent the nook from feeling even tighter
This layout is one of my favorite small workspace ideas because it turns dead space into productive space without taking anything away from the rest of the home.
The Galley Layout (Two Walls, Maximum Efficiency)
If you’ve got a small, narrow room to work with—think walk-in closet sized—a galley layout can pack a lot of function into a tight footprint.
Position your desk along one wall, storage or shelving along the opposite wall. You’re essentially creating a corridor, but a functional one. I used this setup in a narrow spare room once. Desk on the left, filing cabinet and shelves on the right, just enough space to walk between them.
It’s not the most comfortable layout for collaboration or sprawling out, but if your goal is to maximize workspace ideas for small rooms where width is limited, galley layouts make sense.
Galley layout tips:
- Keep the aisle between walls at least 36 inches wide for comfortable movement
- Mount shelves on the non-desk wall at varying heights for easy access
- Use the desk wall for monitor and primary work surface
- Add a rolling file cart instead of a fixed cabinet if space is extremely tight
- Position task lighting to eliminate shadows between the two walls
The galley layout is common in home office design architecture for urban apartments where rooms are long and narrow rather than square.
Testing Your Layout Before Committing
Here’s something I wish someone had told me earlier: don’t mount shelves, drill holes, or buy furniture until you’ve tested your layout with tape and cardboard.
Use painter’s tape to outline where your desk will go. Use boxes or cardboard to simulate storage pieces. Then live in that layout for a few days. Sit where your chair would go. Reach for where things would be. Walk through the space like you’re starting and ending your workday.
You’ll catch problems immediately. The desk you thought would fit? Too close to the door. The shelf placement? Blocks the light switch. The chair clearance? Nonexistent.
Pre-layout testing steps:
- Tape out desk, chair, and storage footprints on the floor
- Sit in the taped area and simulate a full workday
- Test clearance by walking through the layout multiple times
- Check sightlines—where will you be looking most of the day?
- Adjust the tape until the layout feels right, then commit to furniture
I’ve saved myself so many returns and so much frustration by doing this. It’s ten minutes of effort that prevents weeks of annoyance.
Final Thoughts
The best home office layout for small homes isn’t the one that looks good in a magazine. It’s the one that works with your actual space, your actual habits, and your actual daily routine.
Start with your room’s shape and constraints. Test layouts before you buy. Use corners, windows, walls, and even closets if that’s what makes sense. And don’t be afraid to go mobile or multi-functional if your space demands it.
Pick one layout from this guide and test it this week. Tape it out. Live with it. Adjust as needed. Small changes in positioning—moving your desk two feet to the left, flipping your chair direction—can completely shift how a space feels and functions.
For more detailed strategies on designing productive workspaces in tight quarters, check out the full guide on Productive Home Workspace Design for Small Spaces.