That corner in your bedroom? The one that’s been collecting laundry you haven’t put away yet? Yeah, that could be your new office.
I spent two years ignoring a perfectly good corner in my apartment because I thought I needed a “proper” office space. Meanwhile, I was working from my kitchen table, moving my laptop every time I wanted to eat, and generally making my life harder than it needed to be. Then I ran out of options and finally set up in that corner. Took me one afternoon. Worked better than any other workspace I’d tried.
Here’s the reality: most of us don’t have spare rooms sitting around. We’ve got corners, alcoves, and weird little spaces that don’t seem useful until you actually need them. This guide shows you exactly how to turn those forgotten corners into actual workspaces that don’t feel like compromises. And if you want the bigger picture on small-space productivity, start with this resource on Productive Home Workspace Design for Small Spaces.
Why Corners Make Sense (Even Though They Seem Weird)
Before I set up my first corner workspace, I thought corner desks were what you bought when you couldn’t afford a real desk. Turns out I had it completely backward.
Corners do things regular desks can’t. They take space you’re already not using—seriously, what else goes in a corner?—and turn it into something productive. You’re not losing any room. You’re gaining workspace without sacrifice.
Plus, when your desk is in a corner, you automatically get this boundary thing happening. You’re not working in the middle of your bedroom or living room. You’re in a defined spot. That separation matters way more than I expected. My brain knows when I’m in the corner, I’m working. When I leave the corner, I’m done.
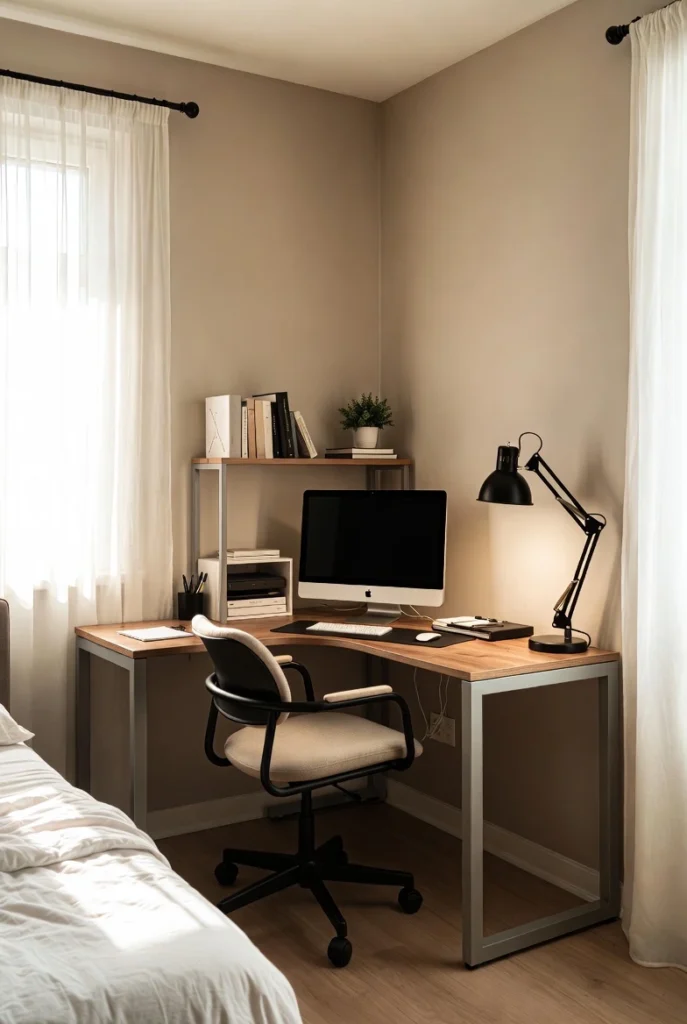
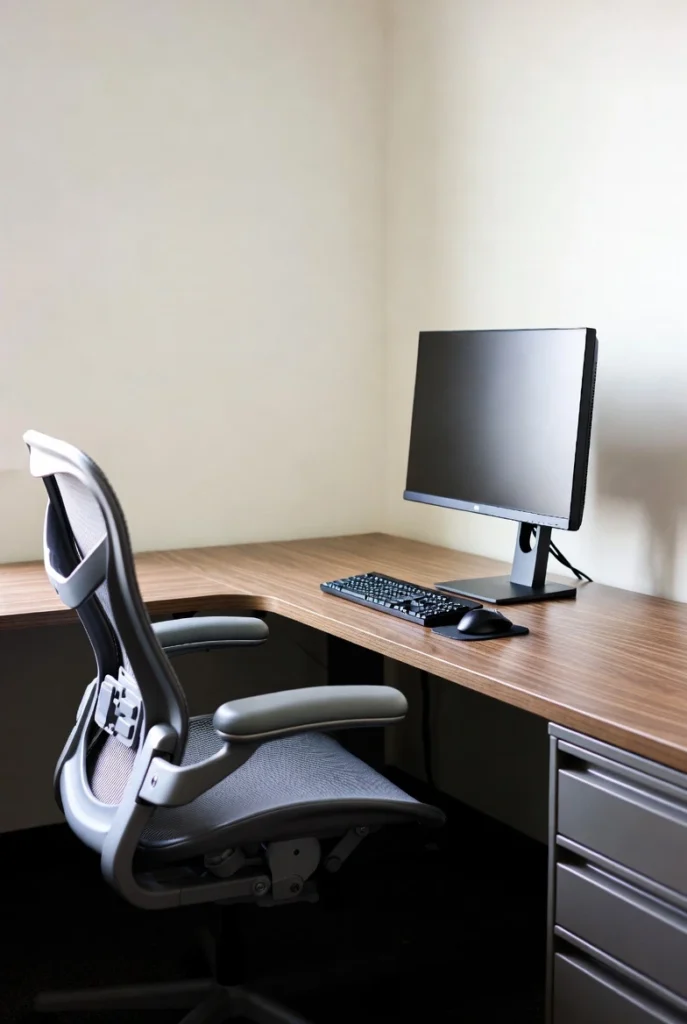
And the surface area situation is ridiculous. An L-shaped corner desk gives you two sides to work with. I keep my monitor on one side, my coffee and notebook on the other. Nothing’s stacked. Nothing’s in the way. Try doing that with a standard 4-foot desk crammed against a wall.
What makes corner workspaces better:
- You’re using dead space that literally wasn’t doing anything before
- The corner creates a natural boundary that separates work from everything else
- L-shaped setups give you way more surface without eating more floor space
- Two walls around you = fewer distractions from the rest of the room
- You can angle yourself to see the room during video calls instead of facing a wall
The whole corner desk trend exists because corners actually solve problems, not because someone decided they looked cool.
Step 1: Find the Right Corner (Not All Corners Are Created Equal)
I’ve set up workspaces in at least five different corners at this point, and some of them were disasters. The corner near my bedroom door? Terrible. Everyone walking by constantly. The corner behind my couch? Better, but no outlets nearby, so I had extension cords running everywhere.
Walk through your place and actually look at your corners. I mean really look. You need power outlets within reasonable distance—like 6 feet max unless you want cords all over the floor. Natural light nearby is ideal but not required. And you need enough space that when you pull your chair back, you’re not immediately hitting a wall or your bed.
I had a corner that looked perfect until I realized it was right next to a heating vent. Spent one week sweating through winter and gave up on that spot.
How to evaluate if a corner will work:
- Check for power outlets first—this is non-negotiable, trust me
- Measure the actual corner dimensions AND the space around it for chair movement
- Look at where natural light comes from (windows, if you have them)
- Notice foot traffic—high-traffic corners kill focus immediately
- Sit in the corner for 10 minutes with your laptop and see how it feels
That last one sounds dumb but it’s saved me from multiple bad decisions. If sitting in a corner feels claustrophobic or weird after 10 minutes, it’s going to feel worse after three hours.
Step 2: Measure Everything (Yes, Everything)
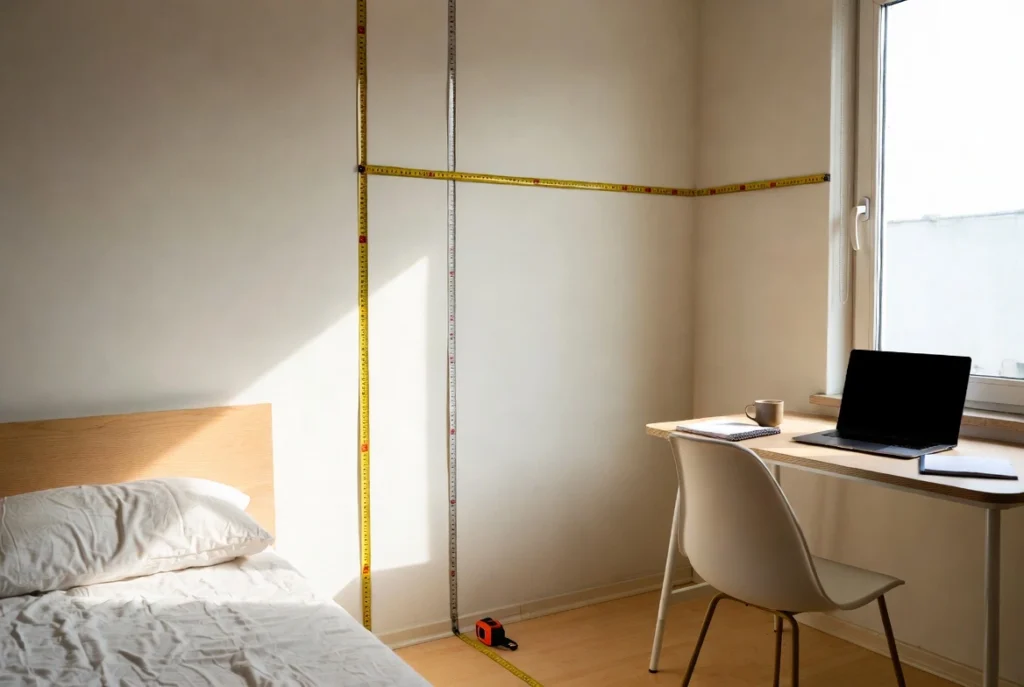
This is where people screw up. They eyeball the corner, order a desk that “looks about right,” then can’t return it when it doesn’t fit.
I did this once. Bought a corner desk that was supposed to be perfect. Got it home. It was four inches too wide on one side. The return process was a nightmare. Now I measure obsessively.
Get a tape measure. Measure the length of both walls from the corner point outward—at least 5 feet in each direction. Measure from the floor to any obstacles (windowsills, radiators, light switches). Measure how far your chair needs to pull back from where the desk will be.
Write it all down. Take a picture of your measurements. You’ll need this when you’re scrolling through corner desk Amazon listings at 11 PM trying to remember if 48 inches will fit.
Measuring checklist for corner workspaces:
- Measure both wall lengths from the corner point (minimum 5 feet each direction)
- Note the distance from the corner to the nearest outlet
- Measure floor-to-ceiling height if you’re considering a corner desk with hutch
- Check the distance from the desk location to the nearest door or furniture
- Measure how much space you need for your chair to roll back comfortably (at least 24 inches)
- Write everything down—don’t trust your memory
Once you have real numbers, you can actually shop for furniture that fits instead of guessing.
Step 3: Pick a Desk That Fits Your Work Style


Here’s where it gets personal. The desk I need is different from what you need because we work differently.
I’m mostly digital. Laptop, notebook, coffee. That’s it. So I don’t need a massive L-shaped desk with tons of storage. But if you’ve got dual monitors, a printer, physical files, and a bunch of gear, you need something more substantial.
The Rolanstar Computer Desk has been solid for tight corners—it’s got this triangle design that fits flush into the corner and includes power outlets built into the desk. That solved my extension cord problem immediately. The SEDETA Computer Desk is another option with a keyboard tray and monitor shelf, which helps if you need to keep your desktop clear but don’t have room for a full hutch.
But honestly, the specific desk matters less than whether it actually supports what you do all day. Don’t buy a desk with a hutch if you never use physical storage. Don’t get a minimalist surface if you need drawers.
How to choose the right corner desk:
- Match desk dimensions exactly to your measured corner space (with 6 inches of wiggle room)
- Look for built-in cable management or grommets—cords in corners get messy fast
- Make sure the surface depth is at least 20 inches so your arms aren’t cramped
- Check stability reviews—cheap corner desks wobble and it’s annoying when typing
- Only get storage (drawers, shelves, hutch) if you’ll actually use it daily
If you’re shopping online, filter by your exact dimensions first. Saves you from scrolling through 500 desks that won’t fit.
Step 4: Set Up Ergonomically (Or Pay For It Later)
I set up my first corner desk wrong and spent two weeks wondering why my neck was killing me. Turned out I’d put my monitor directly in the corner point, so I was twisting my head constantly to see the screen.
Corners mess with ergonomics because you’re working at an angle instead of straight on. You have to be more intentional about where things go.
Your monitor shouldn’t be in the exact corner. It should be on one side of the L-shape, positioned so you can face it directly without turning your head. Your keyboard and mouse go on the main surface where your arms rest naturally. The secondary surface is for your coffee, notebook, or whatever isn’t screen-related.
And your chair needs clearance. I’ve worked in corners where I could barely move, and it felt like being trapped. You need at least two feet of rollback space or you’ll hate it.
Steps to set up an ergonomic corner workspace:
- Position your monitor on one side of the L-desk, NOT in the corner apex
- Adjust screen height so the top of your display is at or just below eye level
- Keep your keyboard and mouse on the surface directly in front of you
- Make sure you can sit with your feet flat and arms at 90 degrees
- Test chair rollback—you should be able to move back 24 inches minimum without hitting anything
- Use a footrest if your chair height doesn’t let your feet rest flat on the floor
Corner desks with shelves or hutches can help with monitor height, but make sure the hutch doesn’t block light or make you feel boxed in. I tried a corner desk with a tall hutch once and felt like I was working in a cubicle.
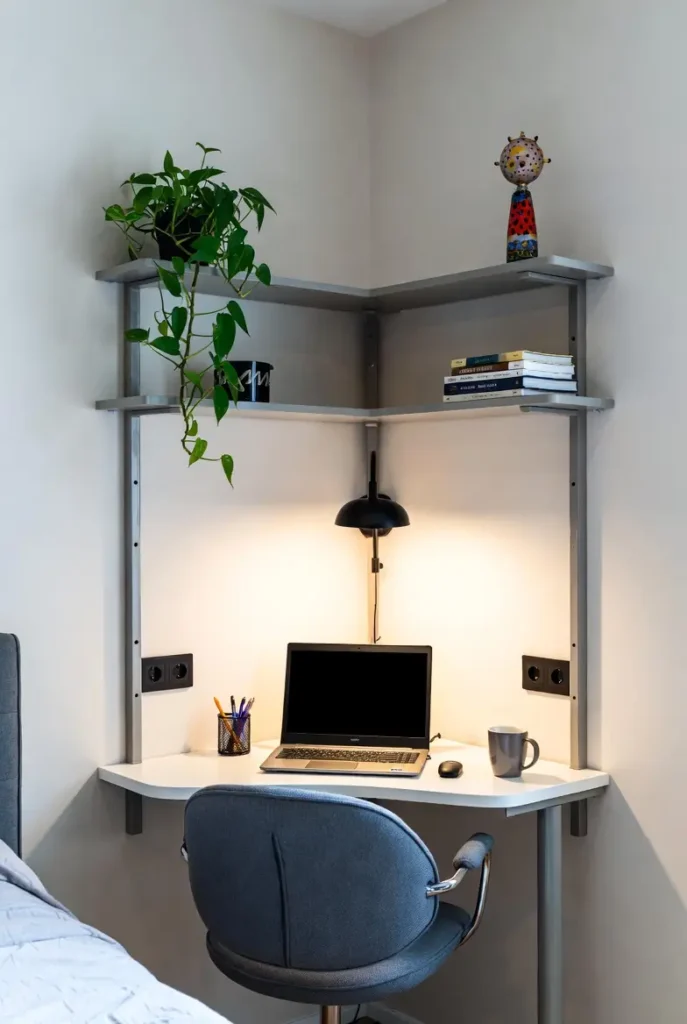
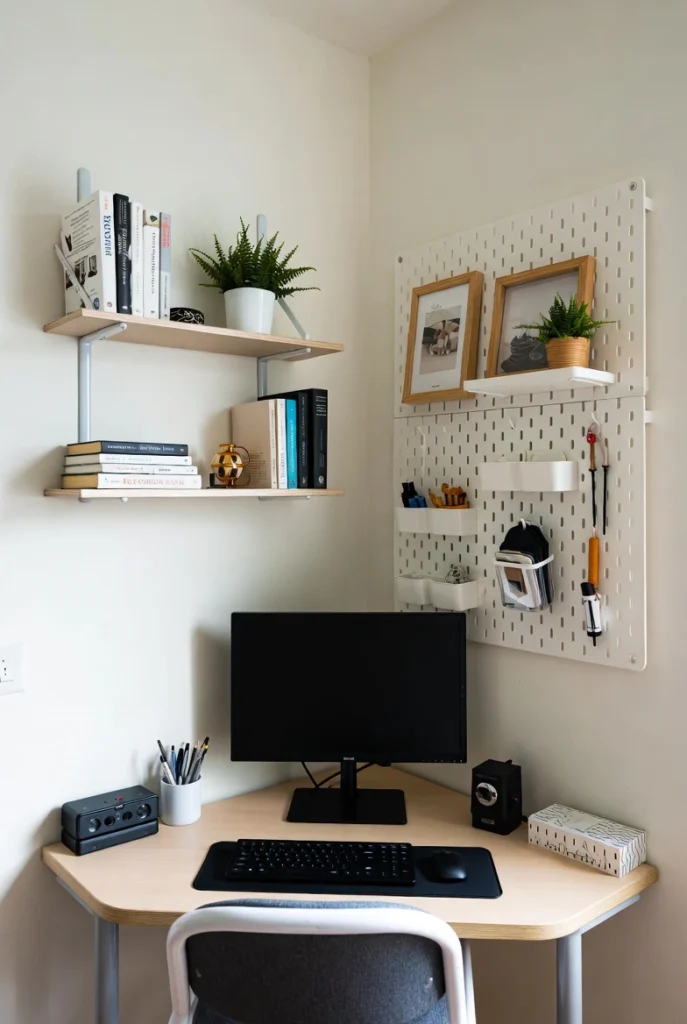
Step 5: Use Your Walls (Because You’ve Got Two of Them)
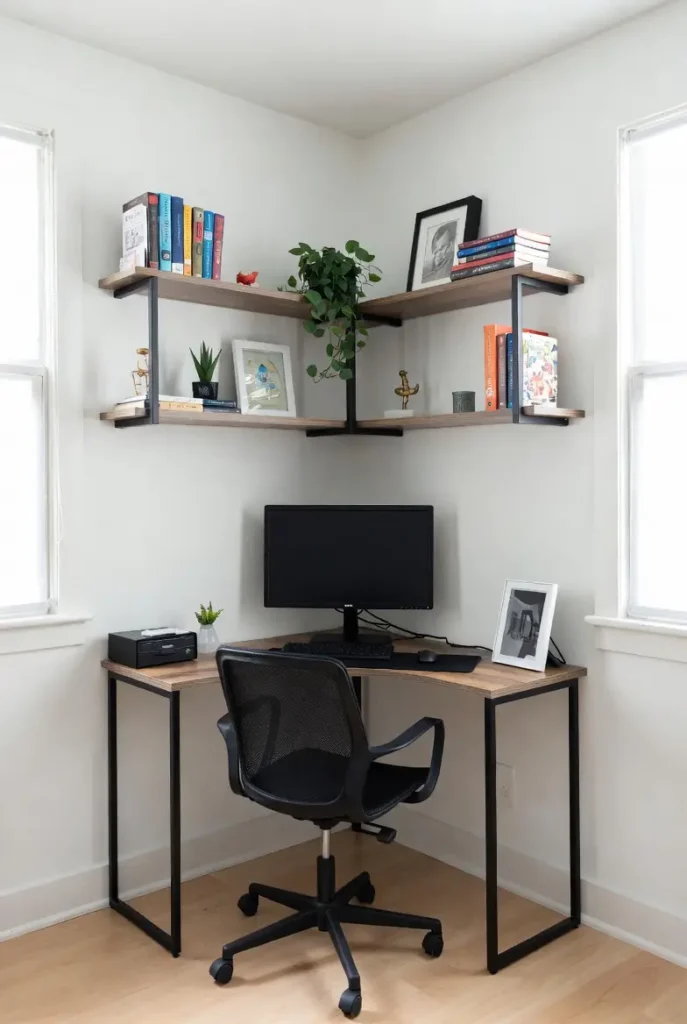
This is the secret advantage of corner workspaces that nobody talks about enough. You have two walls right there. Use them.
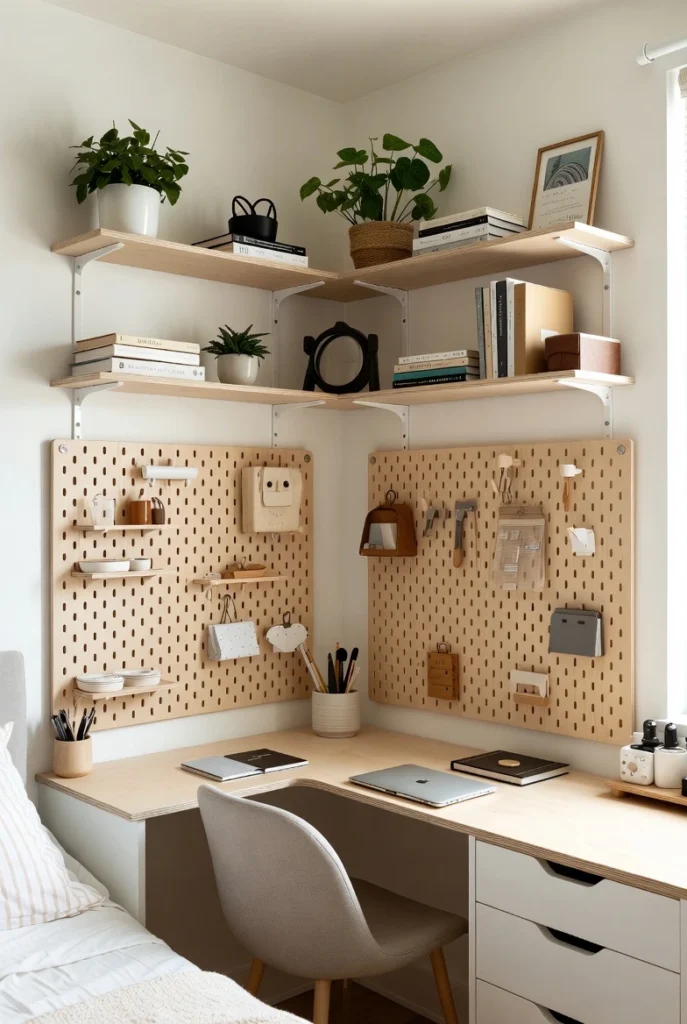
I’ve mounted floating shelves on both walls above my corner desk. One side has books and supplies. The other has a pegboard for headphones, charging cables, and random stuff I grab constantly. My desk surface stays completely clear because everything lives on the walls.
Corner desks with built-in hutches do this automatically, but you can DIY it cheaper with a few shelves and brackets. The key is keeping things accessible. If you have to stand up and stretch to reach something you use every day, the storage isn’t working.
How to maximize vertical space in corners:
- Install floating shelves on both walls at different heights (start 12 inches above the desk)
- Use a pegboard on one wall for items you grab frequently (headphones, cables, tools)
- Mount a small closed cabinet above the desk for supplies you use weekly
- Add LED strip lighting under the lowest shelf for better task lighting
- Keep your most-used items at seated eye level so you can grab them without standing
This is where cozy corner workspace setups really shine. Everything you need is within reach, but nothing’s cluttering your desk.
Step 6: Make It Feel Focused Without Feeling Isolated
The first time I worked from a corner, I faced the walls all day and it was depressing. Just me and two blank surfaces. I lasted about three days before I wanted to quit.
Corners naturally face away from the room, which is good for focus but bad if it feels like you’re being punished. You need to make the space feel intentional.
I added a small corkboard to one wall for notes and photos. Put a plant on a shelf on the other wall. Suddenly the corner felt like my workspace instead of a place I’d been banished to. The walls became useful instead of just barriers.
You want enough personality that the space doesn’t feel sterile, but not so much that it’s distracting. One plant or one piece of art. Not seven things competing for your attention.
Steps to create a focused corner zone:
- Add one piece of art or a corkboard to one wall to break up blank space
- Use noise-cancelling headphones or white noise if the room is shared
- Position a small mirror if you want peripheral awareness of the room behind you
- Limit desk decor to one or two items max (one plant OR one photo)
- Set up task lighting that’s different from the rest of the room to create a “work mode” atmosphere
The goal is a corner that feels like it’s yours, not like you’re facing the wall because you did something wrong.
Step 7: Deal With Weird Angles and Awkward Spaces
Not every corner is a perfect 90-degree angle. Some are weirdly angled. Some have sloped ceilings or radiators in the way. I’ve dealt with all of it.
I once tried to set up in a corner that was maybe 95 degrees instead of 90. Standard L-shaped desks didn’t sit flush against the walls. There was this gap that drove me crazy. I ended up using a triangular corner desk that adapted to the angle, and it actually worked fine once I stopped fighting the space.
If your corner is in an alcove or under stairs, you might deal with heat and airflow issues. I clipped a small USB fan to my desk in one of those situations. Solved the stuffiness problem immediately.
How to handle non-standard corners:
- Measure the actual angle with an angle finder or protractor before buying furniture
- Look for triangular corner desks if your angle isn’t exactly 90 degrees
- Use modular or adjustable desks that can adapt to off-angles
- Add a small clip-on fan if the corner is recessed or poorly ventilated
- Test lighting at different times of day—awkward corners often have weird shadows
These spaces take more planning, but they’re also the ones nobody else wants, which means you get a dedicated workspace without negotiating for it.
Step 8: Keep It Simple (Don’t Turn Your Corner Into a Storage Unit)
I have made this mistake multiple times. Set up a clean corner workspace, then slowly added stuff until it looked like a junk drawer with a desk in it.
A second monitor. A speaker. Three storage bins. A lamp. A plant. Another plant. A desktop organizer. A file holder. Pretty soon my cozy corner workspace looked like I was operating a small retail store.
Corners are compact. Overcrowding them defeats the entire purpose. Stick to what you actually use daily and leave the rest somewhere else.
Corner workspace styling rules:
- Limit decor to one or two items maximum (not one of everything)
- Choose closed storage (drawers or bins with lids) over open shelving that shows clutter
- Use neutral colors to keep the corner from feeling visually chaotic
- Avoid tall items that block your view or make the corner feel cramped
- Hide all cables with clips or channels—visible cords make small spaces feel messy
The best corner workspace ideas are the ones that look intentional and calm, not like you moved your entire office into 15 square feet.
Step 9: Add Storage That Actually Gets Used
Storage in corners is tricky because traditional furniture doesn’t fit the angles. I’ve tried forcing filing cabinets into corners. Doesn’t work. They stick out awkwardly and block everything.
The best storage solutions for corner workspaces are either built into the desk or mounted on the walls. The Rolanstar desk I mentioned earlier has drawers and shelves integrated into the design, which keeps everything contained without adding separate furniture.
If your desk doesn’t have built-in storage, go vertical with wall organizers or use a rolling cart that tucks under the desk. I have a small two-drawer cart that slides under one side of my L-desk. Holds files and supplies, stays out of the way.
How to add storage to corner workspaces:
- Choose a corner desk with integrated drawers or shelves to avoid adding more furniture
- Mount wall organizers or floating drawers for daily supplies
- Use a rolling cart that fits under the desk for flexible storage
- Keep desktop organizers for items you touch multiple times a day
- Store less-used items on higher shelves—only daily items should be at desk level
Corner desk with storage options are worth spending a bit more on if you don’t have room for additional shelving units or cabinets.
Step 10: Test Before You Commit
Last step, and it’s the one that saves you the most hassle: test everything before you make it permanent.
Use painter’s tape to outline where your desk will go. Sit in a chair in that spot for at least an hour. Work from your laptop in that corner for a full day if you can. See what annoys you. See what works.
I’ve taped out corners that looked perfect and then realized the afternoon sun created massive glare on my screen. Or the chair couldn’t roll back far enough. Or the angle felt weird after 30 minutes. All things I would’ve missed if I’d just ordered furniture and drilled holes in the wall immediately.
Testing checklist before finalizing your corner workspace:
- Tape out the exact desk footprint on the floor using painter’s tape
- Sit in the space for at least one full work session (2-3 hours minimum)
- Test chair movement in all directions to make sure there’s enough clearance
- Check what you’re looking at during work hours—walls, windows, the room?
- Notice lighting at different times of day to catch glare or shadow issues
- Adjust the tape and re-test until it feels right, THEN buy furniture
This process has saved me from at least three bad furniture purchases and countless hours of frustration.
Putting It All Together
Turning an unused corner into a workspace isn’t complicated. It just requires being honest about what you need and deliberate about how you set it up.
Find the right corner—one with power, light, and enough room to move. Measure it properly. Pick a desk that fits your work style and your actual dimensions. Set it up ergonomically. Use the walls for storage. Make it feel like your space, not a punishment corner. Keep it simple. Test it before you commit.
This weekend, pick one corner in your home and test it out. Use tape. Sit there. See if it works. If it does, you just created a dedicated workspace without losing any usable living space. If it doesn’t, try a different corner.
Most of us have at least one corner that’s doing nothing right now. Might as well put it to work.
This post contains affiliate links. When you purchase through these links, we may earn a small commission at no extra cost to you. This helps support our testing and keeps our recommendations honest and independent.